Sunday, 31 August 2014

Autumn Decor "Pin"spiration

So now that it's back to school time, and the evenings are starting to get a bit cooler, decorating for fall has been on my mind.  Fall is my favourite season.  I love seeing the leaves change colour, and stopping at the farm stands around us to pick up fresh produce.  This is the first time we'll be decorating this house with autumn decor, and it's seems like a daunting task!  With such a large porch and so many rooms inside, I know that we'll only be doing a few things this year, but here's some inspiration shots.  Maybe in a few years our place will look like some of these!

Autumn Front Porches:
Now that we have an amazing front porch, I'd love to really jazz it up for the fall season.  We spend quite a bit of time out there, so I'd like to make it really spectacular!

Better Homes & Gardens
Common Ground
Stone Gable

Shelterness
Interior Touches:
We probably won't do as much inside this year, but I love some of the little touches that they have added in these photos to really bring the outdoors in.
 

Photo Credits: 1) Adventures in Decorating 2) Dear Lillie  3) The Turquoize Home 
4) Three Pixie Lane 5) The Idea Room

Hopefully in a few weeks, I'll have some of my own photos to share!  Do you decorate your own home for fall?  If you do, what are some of your tricks to help bring the autumn colours into your home?

Happy back to school! 

Sunday, 24 August 2014

Back In The Great Outdoors

Well, I'm officially in back-to-school mode now.  I spent a lot of time in my new classroom this week, cleaning, organizing  and preparing for my 22 new grade 2 students.


While I was back at work, Jeremy was working hard in the yard.  Earlier this week he spent a lot of time clearing out the garage.  On moving day we piled everything in there so the electricians weren't working around all of our furniture inside the house.  


But now that they're all done, we were finally able to get everything into place inside the house.  I came home from work one day to find this.


We still have a lot of organizing to do, but this is a great start.  It's so great to have an open space for cutting wood and hopefully parking the cars this winter!  

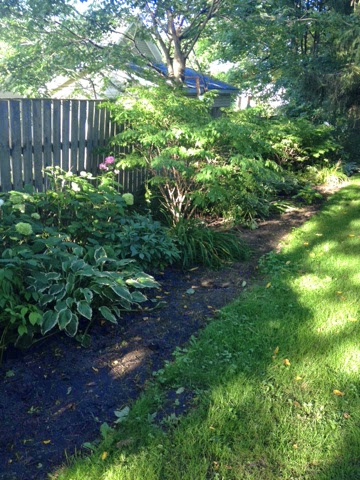
He also spent a lot of time this week working in the front and side yards.  We continue to take out overgrown shrubs and trees to hopefully create a usable yard.  I came home on Thursday to a much cleaner yard!


We still have a few plants to move, but it's amazing how it feels so open and spacious now.  Most of the shrubs from this front garden were moved to the side yard where there was another garden that had been taken over with weeds.  


I feel like the gardens are finally starting to take shape and look how we had envisioned them.  We also spent an afternoon working on a privacy screen for the hot tub.


We might add in a second panel, or move it forward to work it into the fence that we'll be building, but for now it's nice to have some separation from the front yard and the street.  

As the days get shorter and we are back into work mode I know that work on the house will be slowing down quite a bit.  We'll be relying on evenings and weekends to get projects done now and we probably won't start any big projects for the next month or so.  September is always the busiest time of year for us as we transition into new classes and new routines. We're hoping to continue with some smaller projects though, so I'll continue to post even our small accomplishments.

As always, feel free to leave us a comment.  It's the positive feedback that keeps us going!

Wednesday, 20 August 2014

5th Annual Ugly Lamp Contest

If you're looking for a good laugh, head on over to www.betterafter.net and check out their 5th Annual Ugly Lamp Contest.  We stumbled across this contest via another blog, and have been killing ourselves laughing with each new post.  Days 1 and 2 have already been posted, so you'll have some catching up to do, but it's worth it!  Make sure you vote for your favourite so it will move on to the finals.

Here's a link to Round 1
http://www.betterafter.net/2014/08/2014-ugly-lamp-contest-part-1.html

and Round 2
http://www.betterafter.net/2014/08/2014-ugly-lamp-contest-round-2.html


Monday, 18 August 2014

Two Rooms Finished!

We've spent a great deal of time working outside of the house and getting the downstairs washroom finished, but we found that there were times that we were waiting for things to dry or there was only room for one person in the bathroom so we started the master bedroom closet. This was also prompted by the inconvenience of living out of a combination of a closet in another bedroom and laundry baskets!

We started things by mudding the holes in the walls (I am not sure what they used this room for, but I pulled about 16 nails from the wall). We also repaired the three holes the electricians made while updating the electrical. From there Aaron primed the room and painted the first coat of paint. The colour we chose for the room was Snappy Dresser by Para which we had mixed in a Benjamin Moore paint to save some money. This room was lacking the large baseboards that were found in the rest of the house so we decided to follow the template we used in the downstairs bathroom and add eight inch pine boards with moulding. I have to say they turned out amazing!! From there Aaron finished off the painting. 


One of the most difficult parts of this renovation has definitely been the layout. Although it is a large room we wanted a lot of furniture in it. We spent the last couple weeks changing the room around and trying out furniture in different locations and sequences to find one that gave us the functionality and aesthetics we were looking for. 

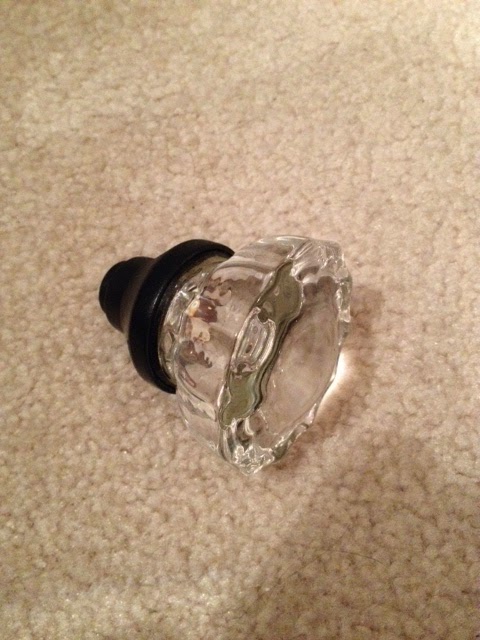
We painted all the doors black as we loved the finish when we did it in our old house. As Aaron has posted before it's some of the smaller details that make a room great, but they are the most time consuming. We spent more time then either of us planned trying to perfect the door knobs with crystal ones that matched the other doors in the house. After spray painting them black and cutting the rods and a few trips to the hardware store for small parts, I think we finally achieved the look we were going for. 


We were very lucky that we were able to use most of our existing furniture in this space, like the dressers. In the old house we had Ikea bookshelves for our sweaters. They worked, but we always found it difficult to keep the things tidy looking. After looking our furniture over we decided to use a shelf we had with cubbies in it. When we put in place it wasn't high enough so we went to Target and found one that added the perfect height to the shelf (and was on sale). We drilled a couple of holes in the bottom and added some dowels for support and a bracket to hold it together for the perfect centre shelf. From there we added three hanging bars for our clothes, giving us far more hanging than our previous closet. 


We added a little art above the dressers. Who can say they have art, a window, a skylight and a balcony in their closet!!


Looking at our laundry hamper and laundry baskets we felt we needed something more functional for our dirty clothes. Finding I was already missing our large front load washing machine from the old house, we needed something that would show it was time to put a load in. We went to a few stores and found the perfect laundry hamper / laundry basket at Walmart. We bought three so we can sort our laundry and know when there is a load ready to go in. 


The room originally had a very ugly track style light in it. While the electrician was here we had him change this to two sconces on either side of the French doors, giving us much needed extra lighting. 


The last touch we added was a belt and tie holder. I think these were the perfect finish for the closet, allowing us to see all the items we own. For the belt holder we cut a four inch board, sprayed it black and added several hooks to hang the belts from. For the ties, again we cut a four inch board and sprayed it black then hammered nails into it so we could see all the ties we owned. 


And finally after less then two months of living in our amazing new home we have two rooms finished and a good chunk of gardens looking like us!!!!

Feel free to add a comment below, we love reading your thoughts and feedback!


Saturday, 16 August 2014

Bathroom Reveal

I am so excited to be writing this post, because it means that we finally have one room done! Well...for the most part, that is!

Before I share our new and improved main floor bathroom, let's take a look at where we came from.  When we moved in, this room had wallpaper on the walls, the ceiling, and the door.


We started this reno about five weeks ago.  At first we planned on just stripping the wallpaper, painting the walls, and putting in a new toilet and vanity.  We figured that would only take a few days.  Then, we found this:


There were eight layers in total.  That's a lot of time spent stripping wallpaper, and repairing all of the damage!  Our electrician also had to cut some holes and take out a panel above the shower, which set us back a few days.

We also hit a few other unexpected bumps.  When we removed the vanity we discovered that the floor underneath it wasn't in the best shape, so this meant adding more to the project (hello, floor paint!).  There were also no shut off valves for the sink or toilet so there was some plumbing involved as well.

Once the bead board started going up though, we could tell that we were in for a major change.


We really wanted to make the trim in this room match the original, so we used 8" pine boards around the base and 4" pine boards above the bead board.  With the addition of some chair rail for some extra added detail, they really do look like the original trim in the house!

And now that everything has been primed and painted, we have our bathroom back.


It's so much brighter and more welcoming that it was before.  We still have many accessories to add in, but we plan on taking our time and finding ones that we love and that really fit the space.  We are also still working on the door.  Jeremy has been busy stripping off many layers of paint (and wallpaper!), and we hope to have it painted black and hung back up tomorrow.


Source list:
Paint
Walls and Ceiling: Benjamin Moore "Revere Pewter"
Trim and Bead Board: Benjamin Moore "Dove White"
Floor: Benjamin Moore "Asphalt"

Fixtures
Toilet: Home Depot "Glacier Bay"
Vanity, Faucet and Light: Canadian Tire
Medicine Cabinet: Garage Sale

Accessories
Blind: BouClair
Shower Curtain, Bath Mat and Hand Towels: Target
TP Holder: Home Depot
Iron Floor Grate: Lowes


Feel free to leave your thoughts in the comment box below.  We have changed our settings so that anyone can comment now (click on "anonymous" in the drop down menu below, but remember to add your name in your comment so we know who it is from!).


Tuesday, 12 August 2014

Just When We Think It's Going To Be Easy...

We are so close to having two rooms complete, but we keep getting stuck on little things, like doorknobs.  We're currently in the midst of a doorknob dilemma!

A whole lotta' door knobs!

We're really trying to add in some of the original character that's missing in a few of the rooms, like the doorknobs in our bedroom. When we moved in they looked like this:


Functional, but not pretty compared the all of the original crystal and porcelain ones.  So we found these ones at Lowe's:


They came in polished brass or brushed nickel, but neither seemed right so I spray painted them black to match the doors.  The only problem is the hardware that they provided didn't match what was already in the door.  So tonight we bought this set:


We figured we could use the inner parts with the new glass knobs.  Seemed logical, but they're still not working right.

It seems like it's always the small details in the end that cause the most grief, yet they're so important to creating a completed space.  For us, it's these final details, like crystal doorknobs, that really bring the house back to life.

And finally, after some sawing, some screwing, and a lot of thought on Jeremy's part, success!


Now, time for some touch up paint!