Sunday, 22 March 2015

Dining Room Update

It's been a while.  Sorry about that!  We got caught up in drywall dust and paint.  We also decided to take a break from our dining room project for a few weeks.  Sometimes living in the midst of a reno just gets to be too much.

When I last posted, we had just uncovered 100 year old wallpaper after making the decision to drywall over the cracked plaster.  We are both so glad that we made that decision when we did!  My brother spent a few days working on the drywall for us and he did such a great job.  We used 1/4" which is the thinnest drywall you can get.  It matched up with the moulding and trim beautifully which was my biggest concern.


Once the drywalling was done, we were able to begin wallpapering the squares inside the wainscoting to cover the cracks and smooth out the old plaster.  Some of them were in very rough shape! We also added a small moulding to the perimeter of each of the squares to finish them off.  We always felt like they were lacking that final detail. Then the priming began.


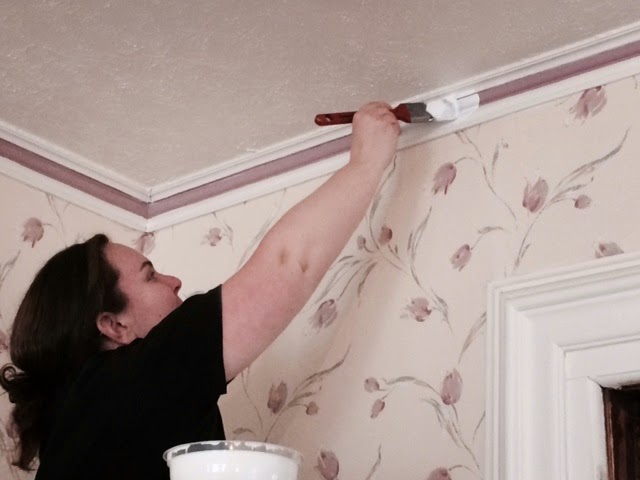
The trim and new drywall all needed to be primed before we could do three coats of Dove White.  There's a whole lotta trim in this room!  We're actually still not done it all yet, but we couldn't wait to see the Revere Pewter (the same colour that we did in the living room) on the top half.  So this is where we are today, almost three months after we started this project:


Our to-do list is still pretty long.  We have to:
-install trim around the patio door
-finish all of the painting
-paint both doors black
-order and install the new medallion
-order and install the crown moulding
-hang the drapes
-paint and recover the dining room chairs

It seems like a lot, but when I look at how far we have come, it's not really that much.  Some of it will wait until a rainy day (like painting the chairs) so hopefully soon I will have a reveal post to write!


Saturday, 31 January 2015

Uncovering the Past

Well, after much talking, debate, and poking and prodding of the walls last night, we decided that drywalling really is the best route to go.  We felt that if we ever do want to paint the room in the future, it would be best to have all of the prep work done now.  At first, we were thinking of drywalling just three walls, and doing something else with the fourth wall that had already been drywalled over many years ago.  But that's when the poking began, and we realized that the old layer of drywall was barely hanging by a few nails.

I started picking at a small corner of it, thinking I would just take down a small piece and see what's underneath.  That's when we found this:


I couldn't stop there! Within about 30 minutes, we had the whole wall down.  The wallpaper underneath is beautiful.  If it was in better condition, we would actually consider keeping it. 


The gypsum board that we removed is dated 1944.  We figure the wallpaper looks like it's from the 20's, and was probably put up just before the Depression, then was covered over once the economy had recovered.   Underneath this layer are two others, one that is VERY dark (probably from the turn of the century) and another lighter green floral that we think was most likely the first paper from when the house was built in 1883.  It goes all the way down the wall, behind the wainscoting panels.

 
Tomorrow we plan on starting to drywall the room.  We'll be using 1/4", the thinnest that you can buy.  We don't need it to be structural, just a good clean surface to prime and paint or wallpaper over.

I'm certainly glad we found this though!  It's like stepping back in time, which is what we were hoping to do as we go through the process of renovating this old house, which is finally starting to feel like our home.

Friday, 30 January 2015

Dining Room Disaster

It's now been 10 days since we started the dining room, and I'm feeling like we've barely even scratched the surface (literally!).  Things started out great.  We started removing the bottom squares of wallpaper, which came off really well.  In most areas there was only one layer so we were able to take them right back to the plaster.


It was when we started the top half of the room that things got slow, frustrating, and rather sticky.  


The top layer has been coming off great in some areas.  There are some spots where they used white glue, so it's REALLY stuck to the plaster. We haven't decided how to tackle those spots yet.


On most of the walls, however, there are multiple layers.  Under the top layer, we found a bird motif which had been primed over.  Under it is a really thick (almost like cardboard) flower pattern. Unfortunately these two layers are just not coming off.  We've tried using a scoring tool and special wallpaper razor blade, but even they're not working. 


So we now have some decisions to make.  We've been researching different solutions, and have come up with two possibilities.  

Option #1: Drywall over the top half of the room.  This will work well in most areas, but in some spots it's been done previously and there's very little depth left on the door trims.  With this option we would be able to paint the top half.

Option #2: Prime the walls, use a thick wallpaper lining to cover the many bumps and imperfections, then wallpaper over top.  In some ways, this option feels like we are just adding more layers to the ones already on the walls, but it will do the job and give us the finished look we are going for.

At this point, we are strongly considering option #2.  Although I don't love the thought of adding more wallpaper, it does go with the age of the house, and I feel like it adds warmth to a space.

We found this option at Bouclair, which is reasonably priced and goes with our design plan.


So that's where we stand right now.  Sticky glue, many layers, and more wallpaper on the horizon.


Thursday, 22 January 2015

Dining Room "Pin"spiration

So now that we're mostly done with the living room (why won't the drapes hem themselves?), it's time to move onto the next room.  With the living room now being so open to the dining room, it seemed logical to us that it should be the next space for us to tackle.

Here's what it looked like when we purchased the house:


 This room has a lot of great things going for it, and we've already made some changes over the past few months.  When we had the electrical done, we installed a new chandelier.  One day I accidentally leaned on one of those stripper poles and realized they weren't even attached.  Down they came!  We removed the odd bookcase and installed a door in it's place. And we have now ripped up all of the carpet to expose the beautiful hardwood that was hidden underneath.


Although those changes have really made a big impact on the space, it's now time for the ultimate change.  That forest green wallpaper has got to go. 

So here's our plan:

-lighten up the space by painting the wainscoting and all trim Dove White (to match the rest of the trim in the house)
-remove the foam crown moulding and medallion (too many roses!) and replace with wood
-wallpaper the top half
-paint and recover the dining room chairs
-hang drapes to match the living room 

This is the kind of look we are going for:

Source: casablancatransformation.blogspot.com
Source: lauralberninteriors.com
Source: meredithheron.com

Source: bobvila.com

Source: houzz.com
 And now, let the wallpaper stripping begin!


Sunday, 4 January 2015

Living Room Transformation


It's hard to believe that Christmas and New Years have come and gone, and tomorrow we will be back to work.  Having the past two weeks off has been great, but not restful!  We started our holidays with a few small jobs before Christmas, like painting some doors, changing out light fixtures and hanging drapes in the dining room.

Then the real work began on Boxing Day.  Our plan was to paint the living room and finally get rid of the tulip wallpaper.  Here's a reminder of the space we started with. 


Our 1st visit
Tiny doors in a giant room
The day after we moved in


 We had been considering removing the doors between the living and dining rooms.  The shelves were a bit odd and the doors seemed too small for the space.  It just didn't feel right.  So we took a giant leap of faith and started tearing down the wall.


The room feels so much more open, and the dining room is so much brighter now.  It was definitely a good decision.  The hardwood flooring went right underneath the wall and there are spaces where large pocket doors would have been originally.  We're hoping to find a pair and re-install them someday soon.

Since we would be making a trip to the dump, it only seemed right to also rip up the carpet in the dining room at the same time!  

Shiny hardwood under the carpet!
  

And then the priming and painting began. This is a big room, with lots of trim to paint so we recruited some help.  We seriously could not have done it without our friends Amy and Janice and my brother Ryan and sister-in-law Tami.  They're painting machines!


We spent a lot of time thinking about how we could mount our television over the fireplace and not see the cords and cables.  My brother even cut some holes, only to discover solid brick behind the plaster.  But when we accidentally removed the top of the mantle we discovered a piece of wood that we were able to drill a hole through to feed some electrical and cable.  


We then installed some panel molding above the fireplace, with a removable piece that hides all of the wires going up to the television.


We still have small touches to finish like adding mesh covers to hide the dvd player and cable box in the mantle and painting the tile around the fireplace, but the room is mostly done now.  I'm sure the tulips were a big hit back in 1985, but they won't be missed today!